Posted on

CSIC GitLab Service

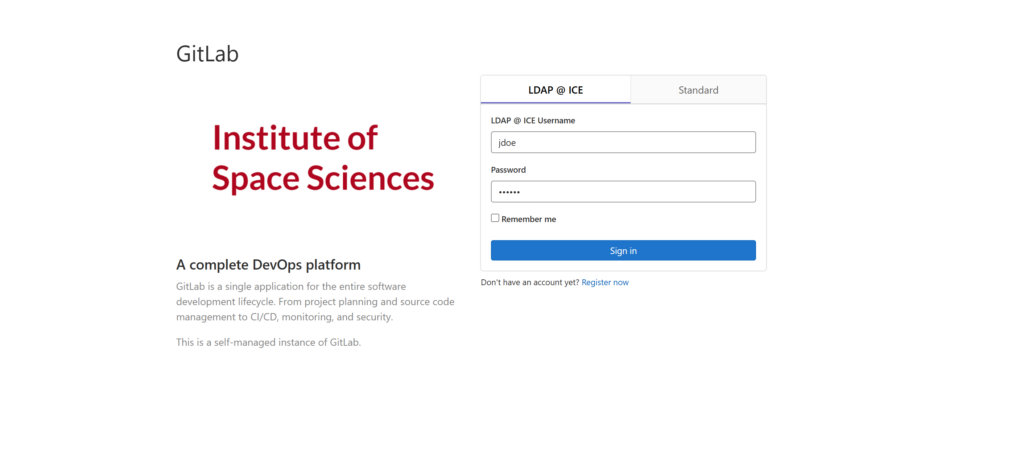
You can acces CSIC’s GitLab here by login with your credentials.

In order to export an existing repository from the ICE GitLab do the following:

Step 1 – Acces ICE GitLab service

Go to the ICE Gitlab servers https://gitlab.ice.csic.es and log in with your ICE User credentials.

Step 2 – Export the project

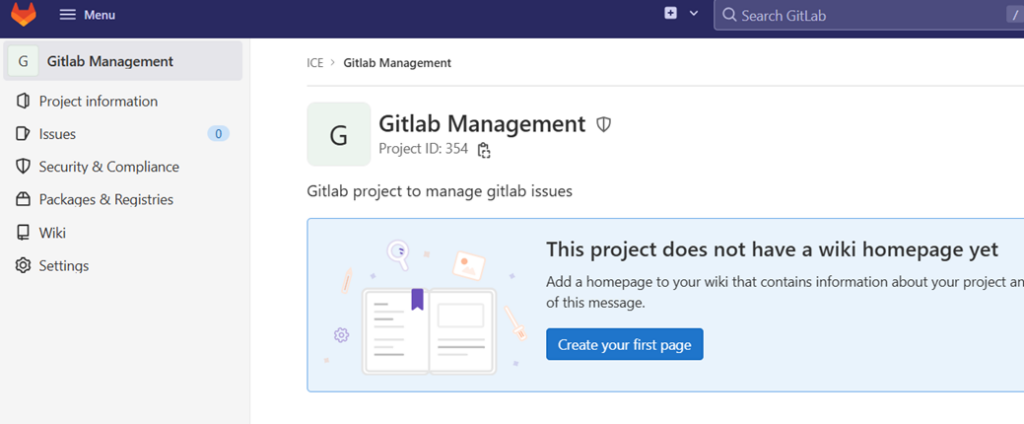
Go to the project that you want to export. Notice that If you have unsynced project changes in your local folder, before performing the next step, you must upload the changes to the repository.

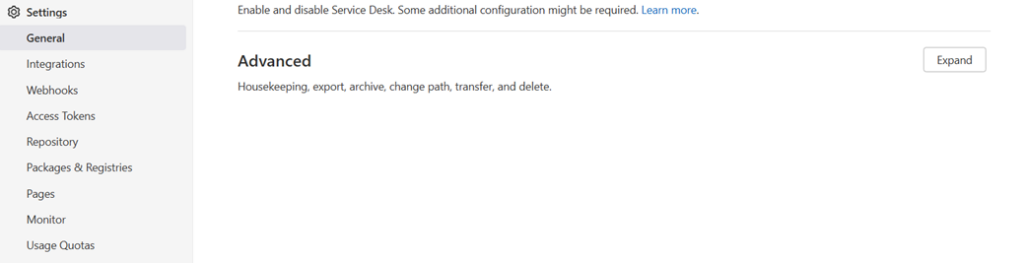
Go to Settings-> General -> Advanced Settings and click in Expand button.

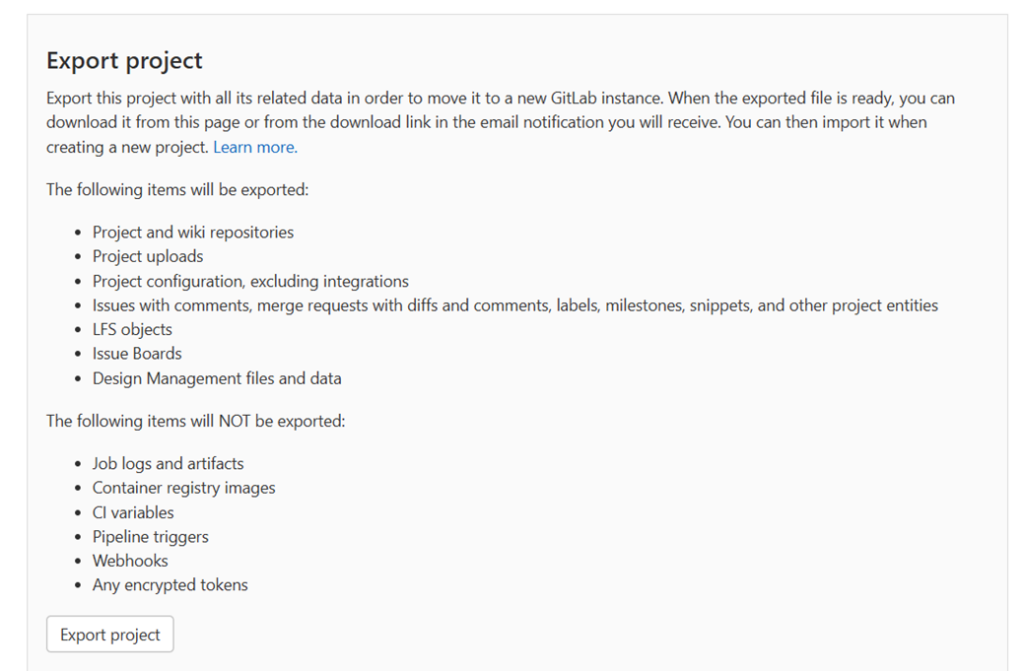
Scroll down to Export Project and press the Export project button.

After pressing the button, a banner indicating that the project is being exported will be shown, and after a few minutes (depending on the size of the project), you will receive an email to download it.

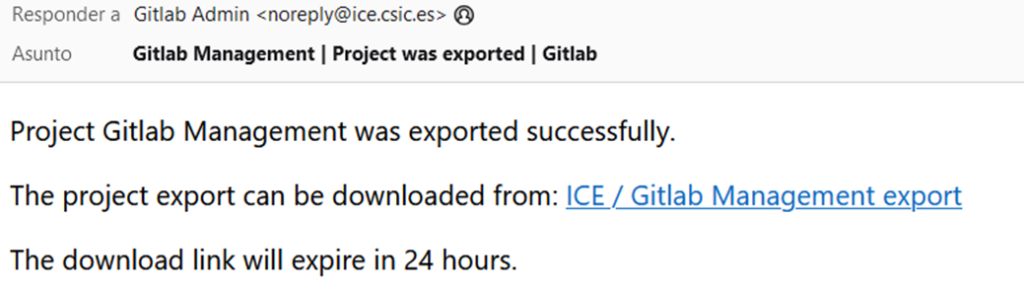
Step 3- Download the exported project

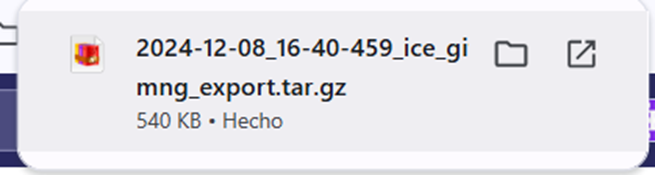
Click on the link to start the download of the project.

Step 4 – Import the project

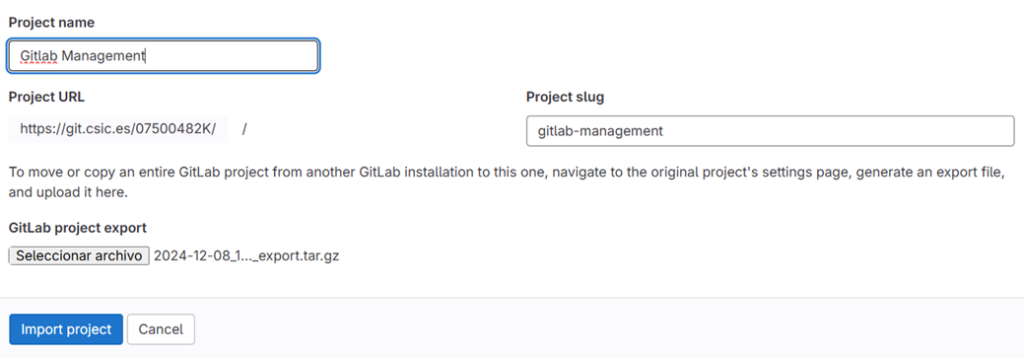
Now, go to CSIC’S GitLab and log in with your CSIC credentials. Then, create a new project.

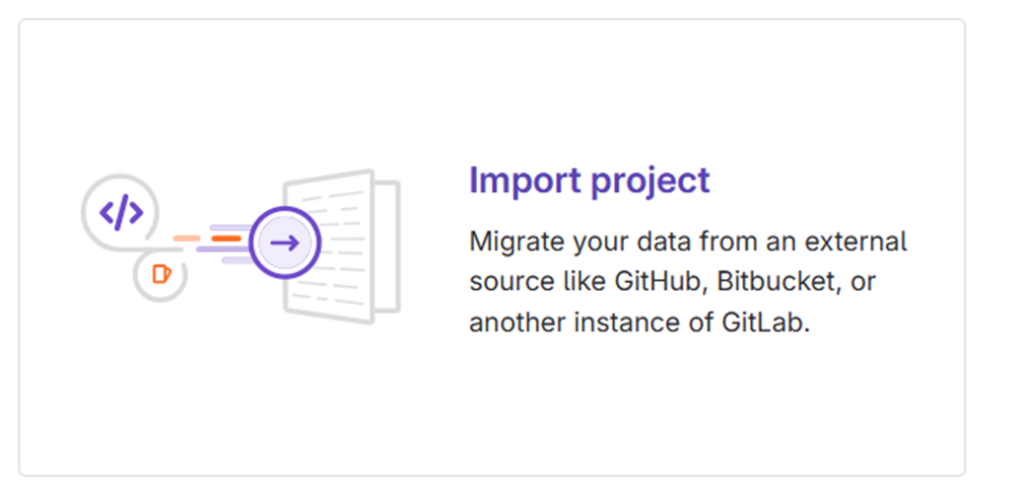
Select the Import Project option.

Click in GitLab export.

Then, select the previously download file and complete the setup. It can take a while until it finishes.

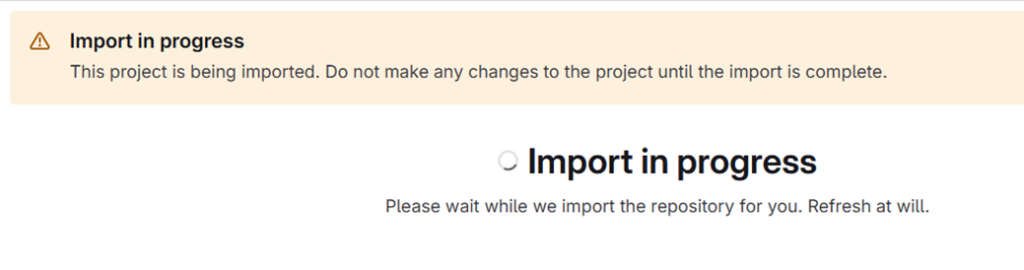
With this you successsfully imported your project to CSIC’s GitLab.

Posted on

SACO (NextCloud Client)

SACO is a cloud storage service provided by CSIC, you can store up to 300GB of data. Under the hood It uses a software called NextCloud.

You can access it by login here with your CSIC credentials or install the desktop client for a better integration. This guide will show you how to install and configure the client.

First, go to the Next Cloud official site, hover into Download and select “Desktop & mobile apps”.

Select the installer according to your OS and run it.

When the setup wizard opens, select”Log in”. In the next step, write https://saco.csic.es as the server address.

Click “Next” and then, a window in your browser will pop up. Click in “Iniciar sesión” to log in with your CSIC account.

Write your CSIC credentials. Then, click in “Conceder acceso”(allow access). Once it’s done, you can close the browser.

Now, if you look at the bottom-right of your system, the NextCloud icon will be shown, click into it. A window will open asking what should be synced. Click connect to complete the configuration.

Then, all your files will start to sync and it should be ready to go.

Posted on

Personal Calendar

You can create calendars in the CSIC email platform and then use them in Thunderbird, these calendars are stored in a server, not in your local machine, so allways will be updated even if you do it from a different machine. First, go here and login with your CSIC account.

Once logged in, your mailbox will be shown, you can go to the calendar section by clicking in the icon at the top-right.

You’ll see that you have already a personal calendar created, click in the three dots to toggle the vertical menu and then go to “Links to this Calendar”.

Copy the “CalDAV URL” under the section “Authenticated User Access” and then open Thunderbird.

In Thunderbird, go to Calendar and click in “New Calendar”, a new window will pop out.

Select “On the Network” and click “Next”.

Next, write your CSIC username in “User name” and paste the CalDAV link that you copied before. Then, click “Find Calendars” and you will be prompted to put your password.

Finally, a final window where you can customize your calendar will be shown, click “Subscribe” to end the configuration process.

Posted on

Shared Calendar

You can create shared calendars in the CSIC email platform and then use them in Thunderbird. To do so, go here and login with your CSIC account.

Once logged in, your mailbox will be shown, you can go to the calendar section by clicking in the icon at the top-right.

This image has an empty alt attribute; its file name is image-1024x224.png

Click in the add icon (+) to create a new calendar and give it a name.

Once created, click in the three dots to toggle the vertical menu and then go to “Sharing…”.

In the search bar, type the email of the person you want to share the calendar with and select it.

Check the checkboxes according to your preferences and click “save”.

With this, the person has access to your calendar. Now, click in the three dots to toggle the vertical menu and then go to “Links to this Calendar”.

Copy the “CalDAV URL” under the section “Authenticated User Access” and send it to the other people.

The next steps are the same as in the presonal calendar configuration, each person you shared the calendar with, has follow it in order to configure the shared calendar in Thunderbird. Open Thunderbird, go to Calendar and click in “New Calendar”, a new window will pop out.

This image has an empty alt attribute; its file name is image-3-872x1024.png

Select “On the Network” and click “Next”.

This image has an empty alt attribute; its file name is image-4.png

Next, write your CSIC username in “User name” and paste the CalDAV link that you copied before. Then click “Find Calendars” and you will be prompted to put your password.

Finally, a final window where you can customize your calendar will be shown, click “Subscribe” to end the configuration process.